
Nexus Gateway Group
A Nexus Gateway Group in Site24x7 serves as a logical container that helps organize and manage multiple Nexus Gateways within your infrastructure. It acts as a control layer for request routing, load balancing, failover, and performance monitoring.
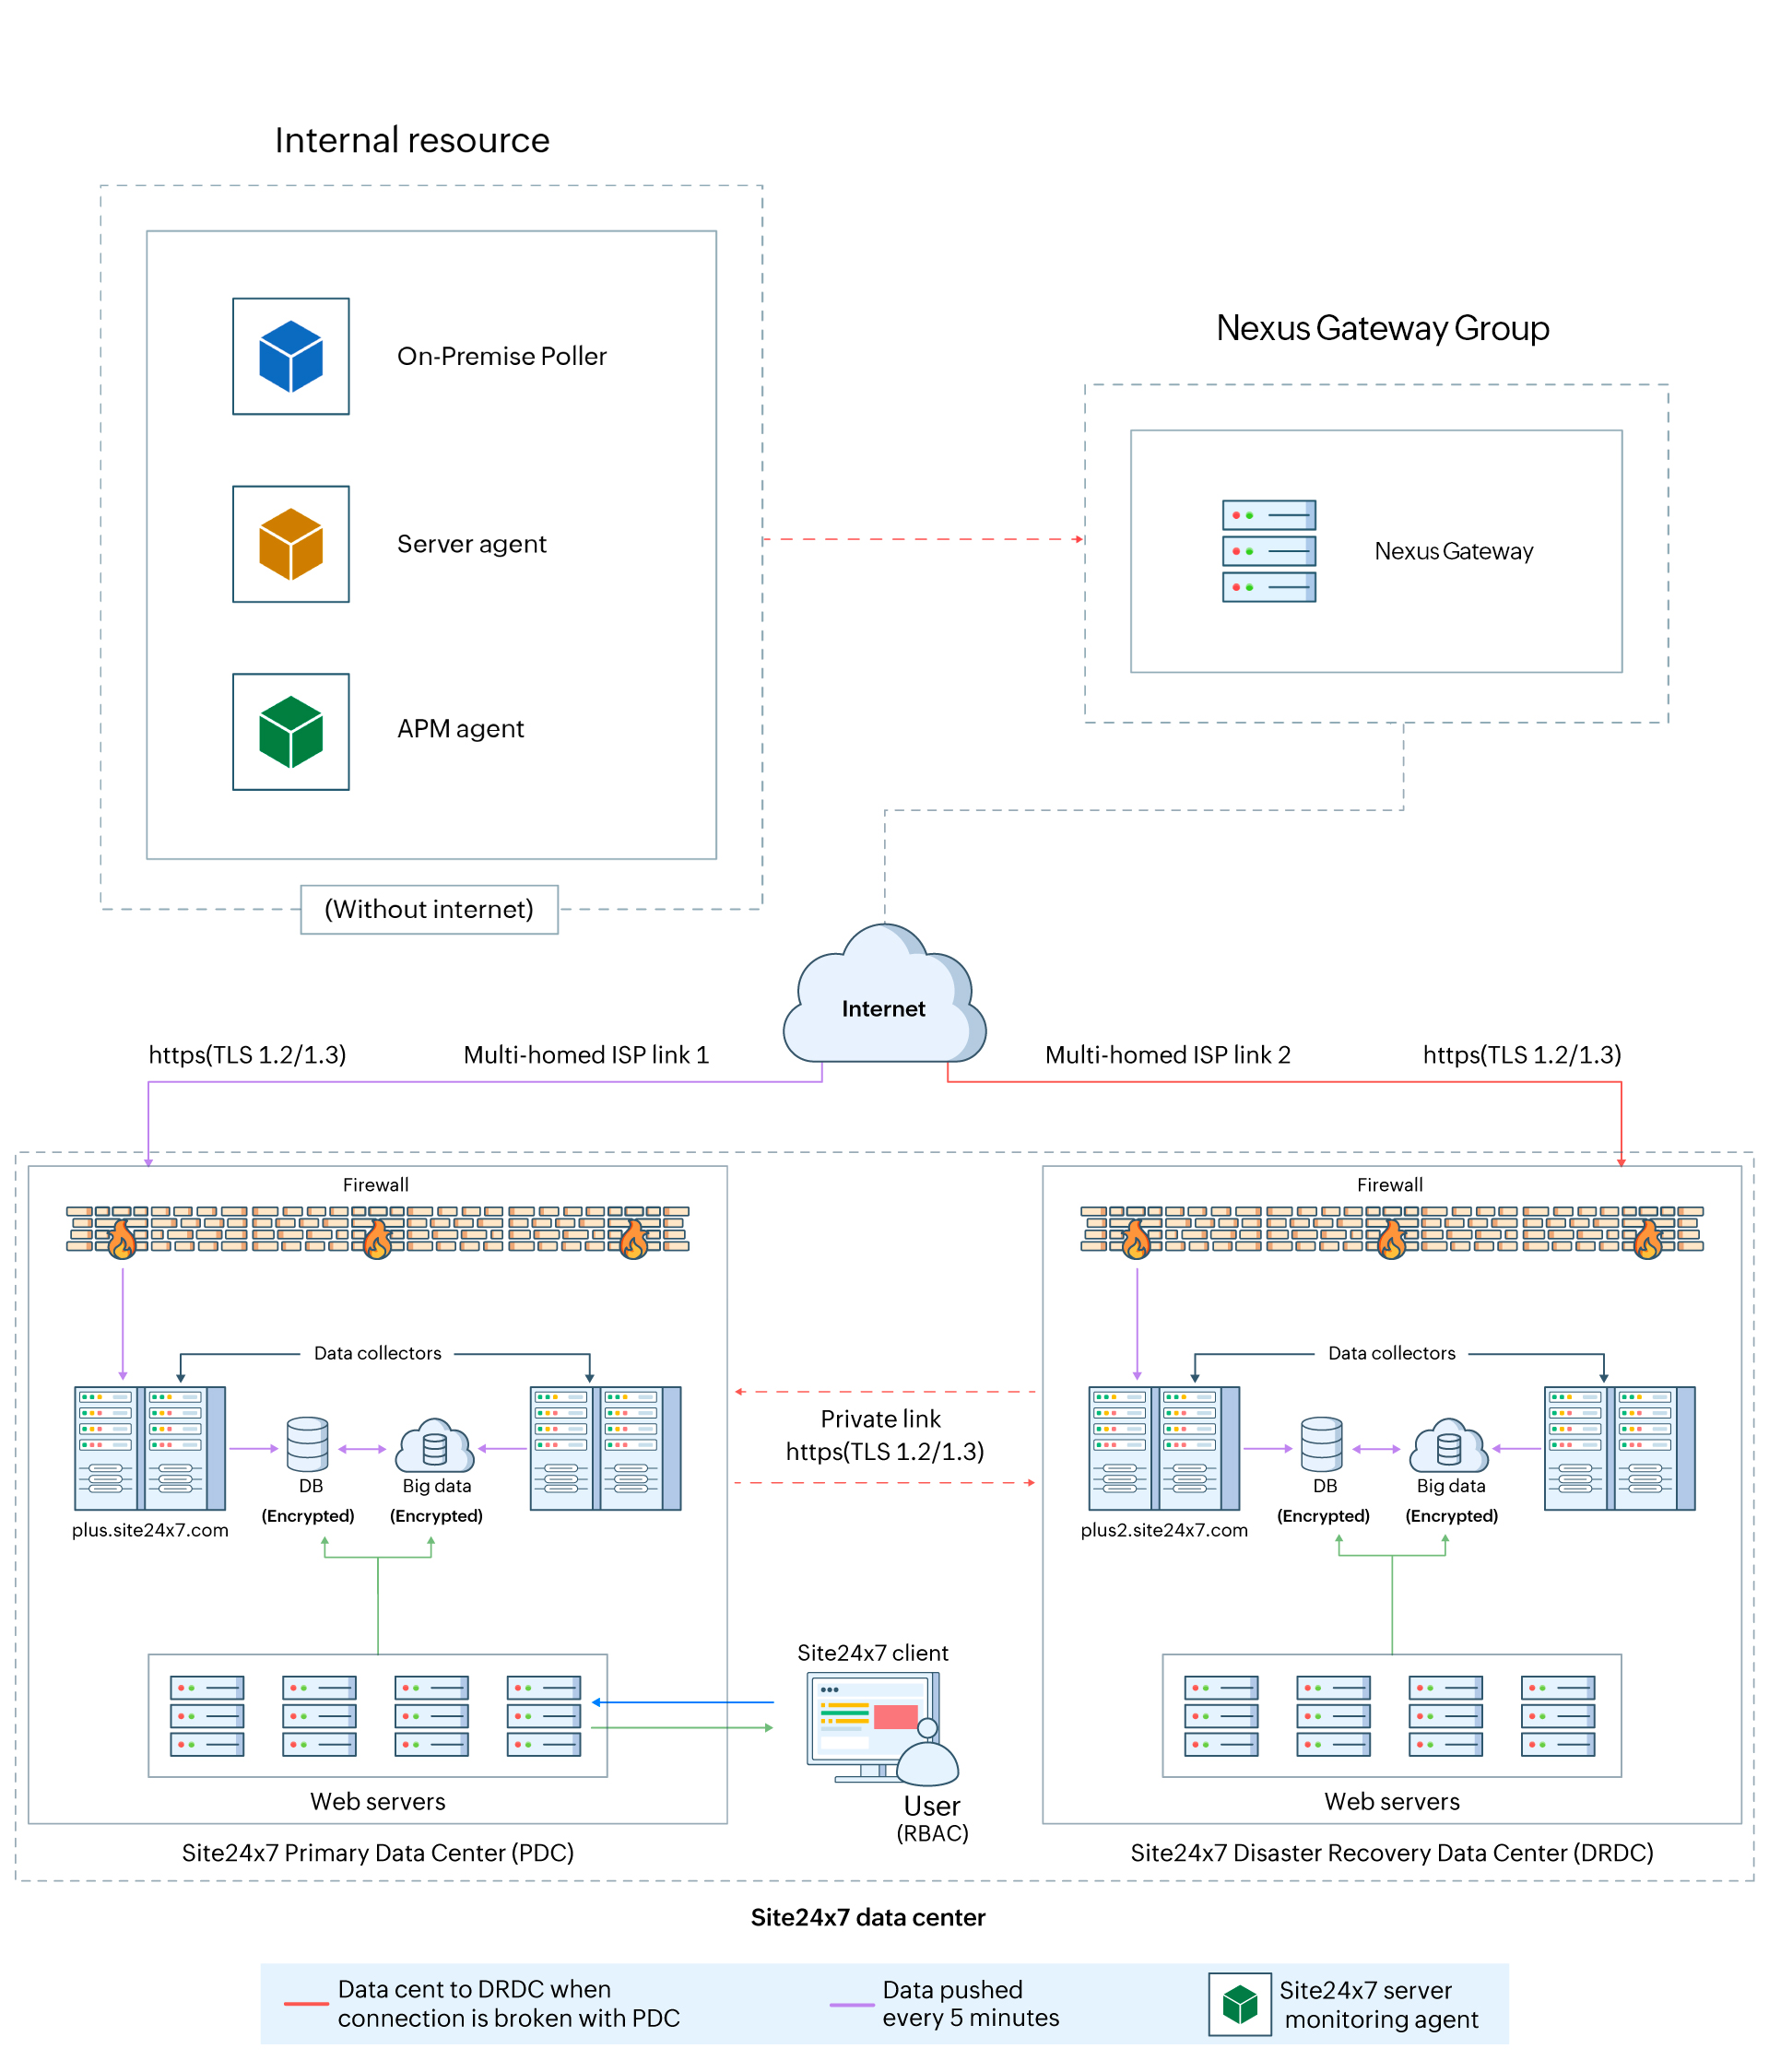
By centralizing Nexus Gateway management, you can streamline communication between Site24x7 agents running in your intranet and the Site24x7 cloud without exposing agents or internal systems directly to the internet.
Use case
In an enterprise environment, internal servers and applications generally operate within a restricted network where direct internet access is disabled due to security and compliance constraints. While these systems need to be monitored, they cannot communicate with external platforms on their own.
To address this, the organization can deploy a Nexus Gateway Group within it's intranet and add a Nexus Gateway. The Site24x7 agent installed on machines without internet access collects performance and health data locally and, instead of reaching the cloud directly, forwards it to the Nexus Gateway. Configured with controlled outbound internet access, the Nexus Gateway securely transmits all collected information to Site24x7's application servers.
This approach ensures continuous monitoring, maintains strict security boundaries, and eliminates the need for individual servers or agents to be exposed to the internet.
Key benefits
In Site24x7, the Nexus Gateway acts as a secure communication bridge, ensuring that data monitored from internal resources is transmitted safely to the Site24x7 cloud platform. Here are some of its key benefits:
- Eliminates the need for every monitored device or agent to have internet access.
- Acts as a central proxy, managing all outbound communication to Site24x7.
- Improves reliability by providing support for high availability and load balancing.
Prerequisites
Before creating a Nexus Gateway Group:
-
Verify that your firewall allows outbound communication to the required Site24x7 domains and ports. Learn more about the ports and domains to be allowlisted for Server Agent, APM, and On-Premise Poller.
-
The Nexus Gateway should have direct access to the Site24x7 Plus server without any proxy configuration.
How it works
-
The flow begins by creating an empty Nexus Gateway Group.
-
During installation, you can add Nexus Gateways to the group one by one using the Nexus Gateway Group key.
-
Once installed, each Nexus Gateway automatically registers itself within the assigned group, eliminating the need for manual selection from the web client.
This structure provides centralized monitoring, simplified configuration, and automated load distribution.
Adding a Nexus Gateway Group
To add a Nexus Gateway to your Site24x7 account, follow these steps:
-
Log in to the Site24x7 account.
-
Navigate to Admin > Nexus Gateway.
-
Then, click the plus icon + beside the Nexus Gateway Group.
-
Click Add Nexus Gateway Group.
-
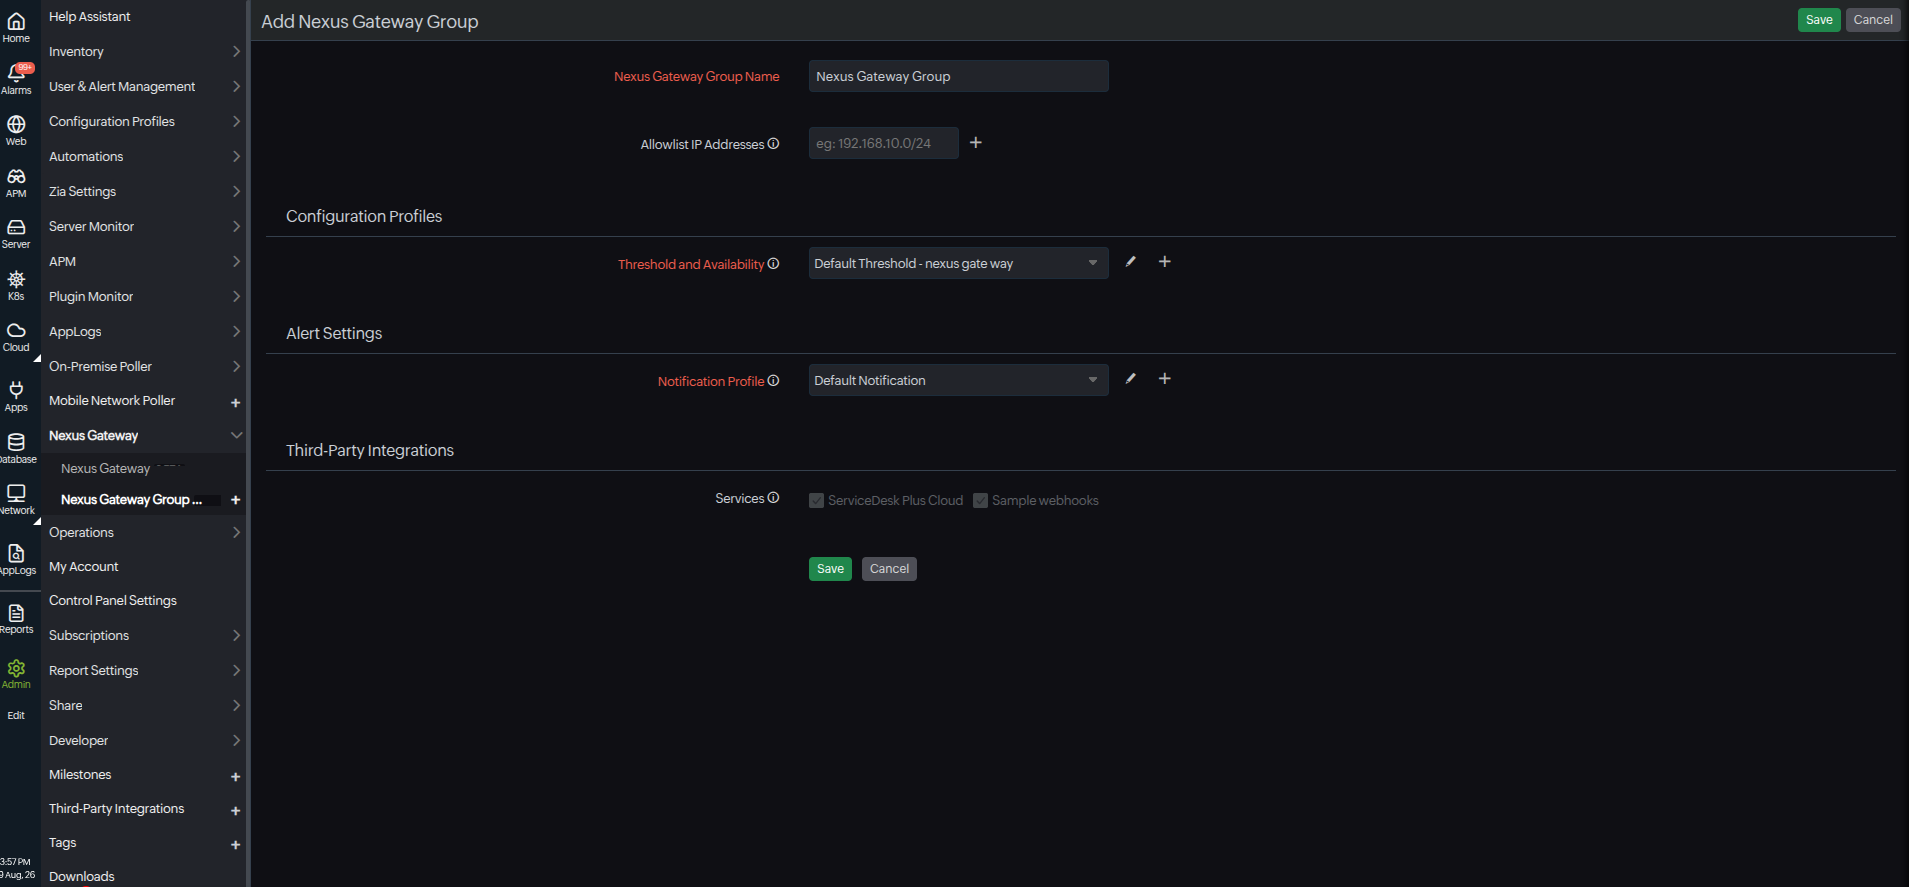
The Add Nexus Gateway Group page will open. Provide the following details:
-
Nexus Gateway Group Name: Specify a name to identify the Nexus Gateway Group.
-
Configuration Profiles: Create a collection of configurations and easily apply them to multiple monitors instead of manually recreating each configuration.
-
Threshold and Availability: Select the threshold profile to be associated with the server monitor. A threshold profile contains the list of all thresholds and the alert type (i.e., Critical, Trouble, or Down) that will be triggered when these thresholds are breached.
-
Click the pencil icon
 to edit the selected threshold profile and the plus icon + to create a new threshold profile.
-
-
Alert Settings: This allows you to configure alert settings based on your team’s profile, ensuring that notifications from the Nexus Gateway monitor reach the appropriate users.
-
Notification Profile: Select a Notification Profile from the drop-down menu or select the default profile that is available. A Notification Profile helps to configure who gets notified and when in case of downtime
-
Third-party Integrations: Associate your monitor with a preconfigured third-party service. This lets you push your monitor alarms to selected services and facilitates for improved incident management. If you haven't set up any integrations yet, navigate to Admin > Third Party Integration to create one.
-
- Click Save.
Once created, the Nexus Gateway Group name will be listed under the Nexus Gateway Group.
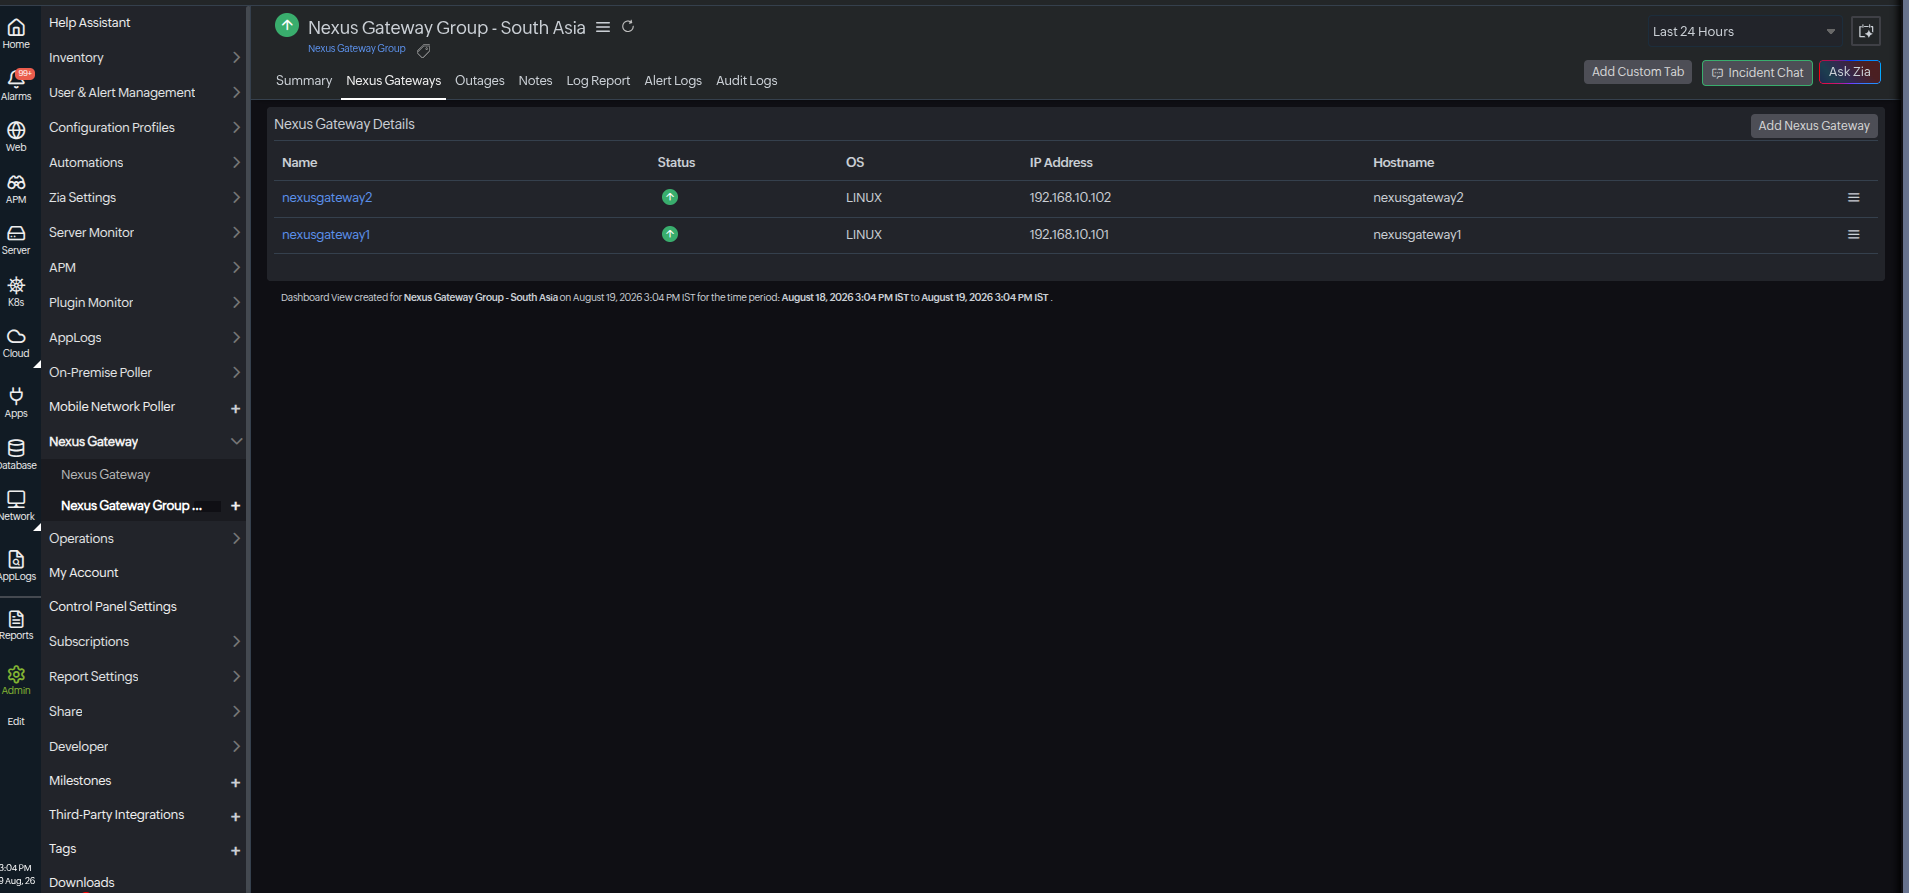
If no Nexus Gateways are associated, you’ll see No. of Nexus Gateways: 0 right below the Nexus Gateway Group name. Clicking this link will take you to the Add Nexus Gateway configuration page to begin installation.