Adding On-Premise Poller
On-Premise Poller helps to monitor your internal network and resources like URLs and network devices behind a firewall or virtual private network (VPN). This software requires near zero maintenance and is firewall friendly and can be considered as a private monitoring station complementing Site24x7's global 100+ locations. Site24x7 On-Premise Poller can be installed on Windows and Linux machines in both 32-bit and 64-bit versions and can be installed in virtual machines as well. The service name is Site24x7 On-Premise Poller service.
Follow these links to add the On-Premise Poller:
Add On-Premise Poller for Windows | Add On-Premise Poller for Linux | In a Linux-based Kubernetes environment | More on On-Premise Poller architecture | Troubleshooting tips
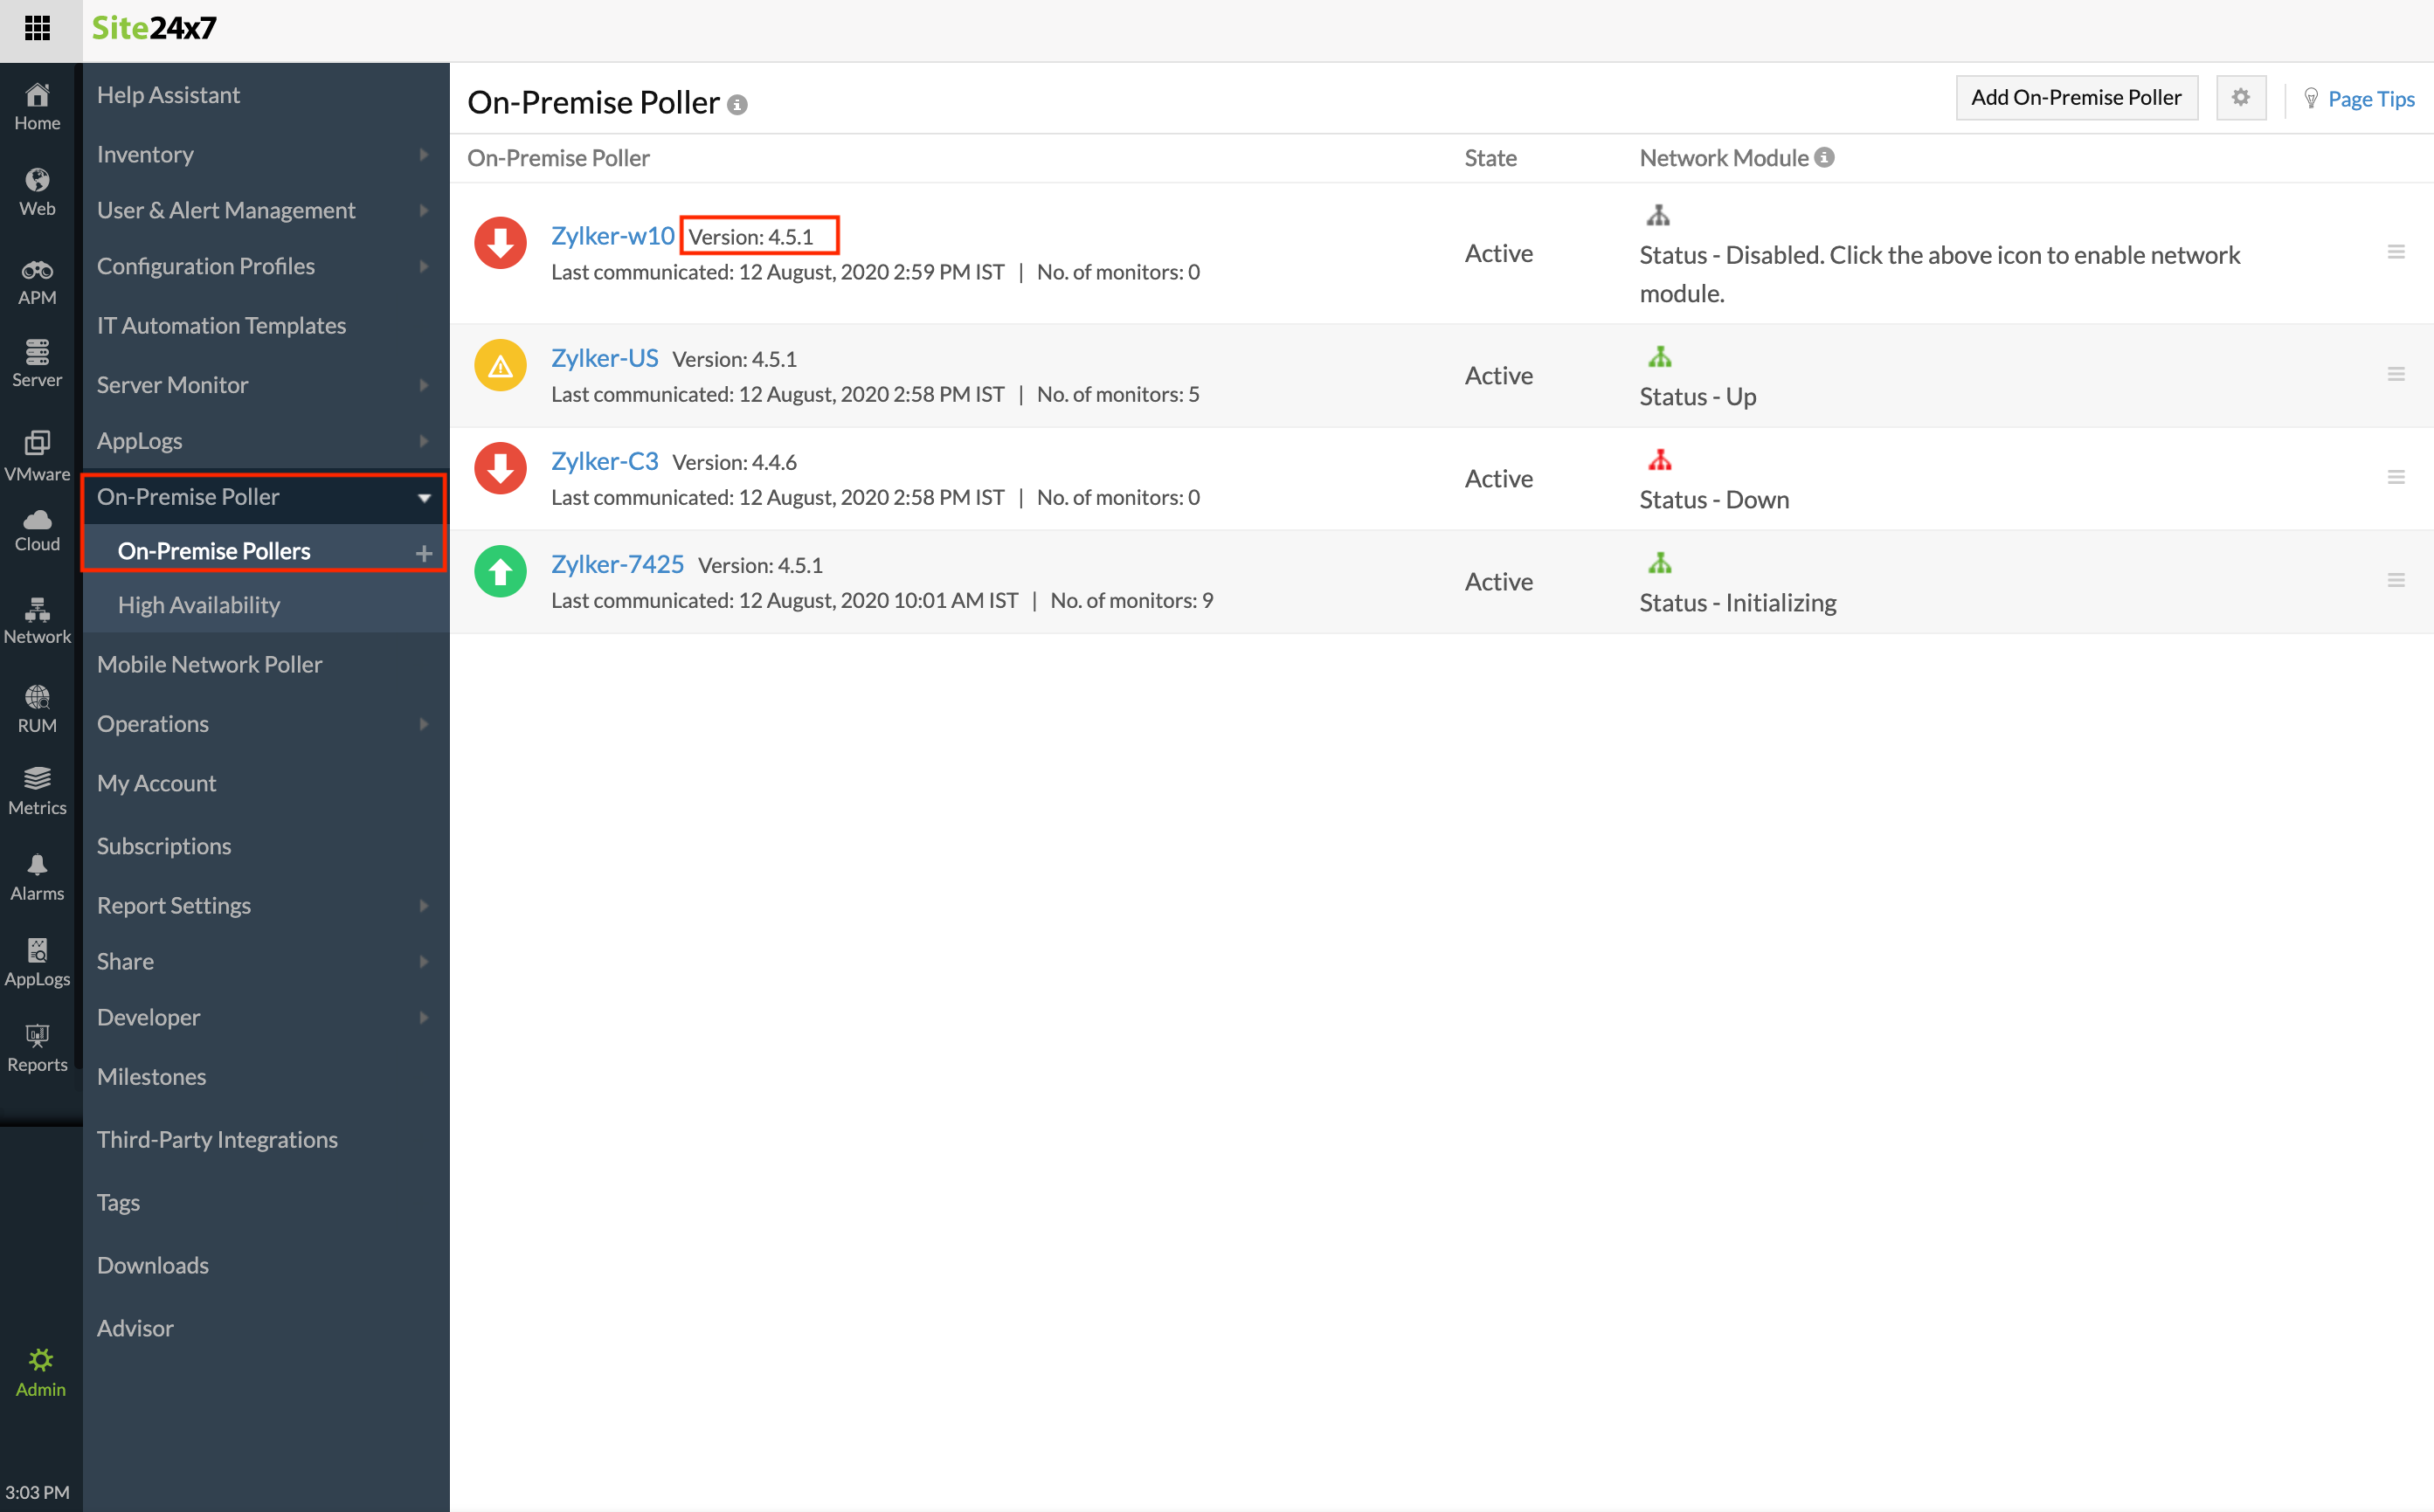
Once the On-Premise Poller is installed, you can view the installed On-Premise Pollers from Admin > On-Premise Poller. You can view the On-Premise Poller version beside its name. Click on the hamburger icon near the On-Premise Poller name to Upgrade to the latest version.

You can associate a supported monitor type to an On-Premise Poller, by adding it for monitoring, adding the location profile and pointing it to the configured On-Premise Poller.
Editing an On-Premise Poller
You can edit an On-Premise Poller to update its display name and make configuration changes. For this:
- Go to Admin > On-Premise Poller > On-Premise Pollers.
- From the list of On-Premise Pollers, click on the hamburger icon next to the desired On-Premise Poller and click Edit.
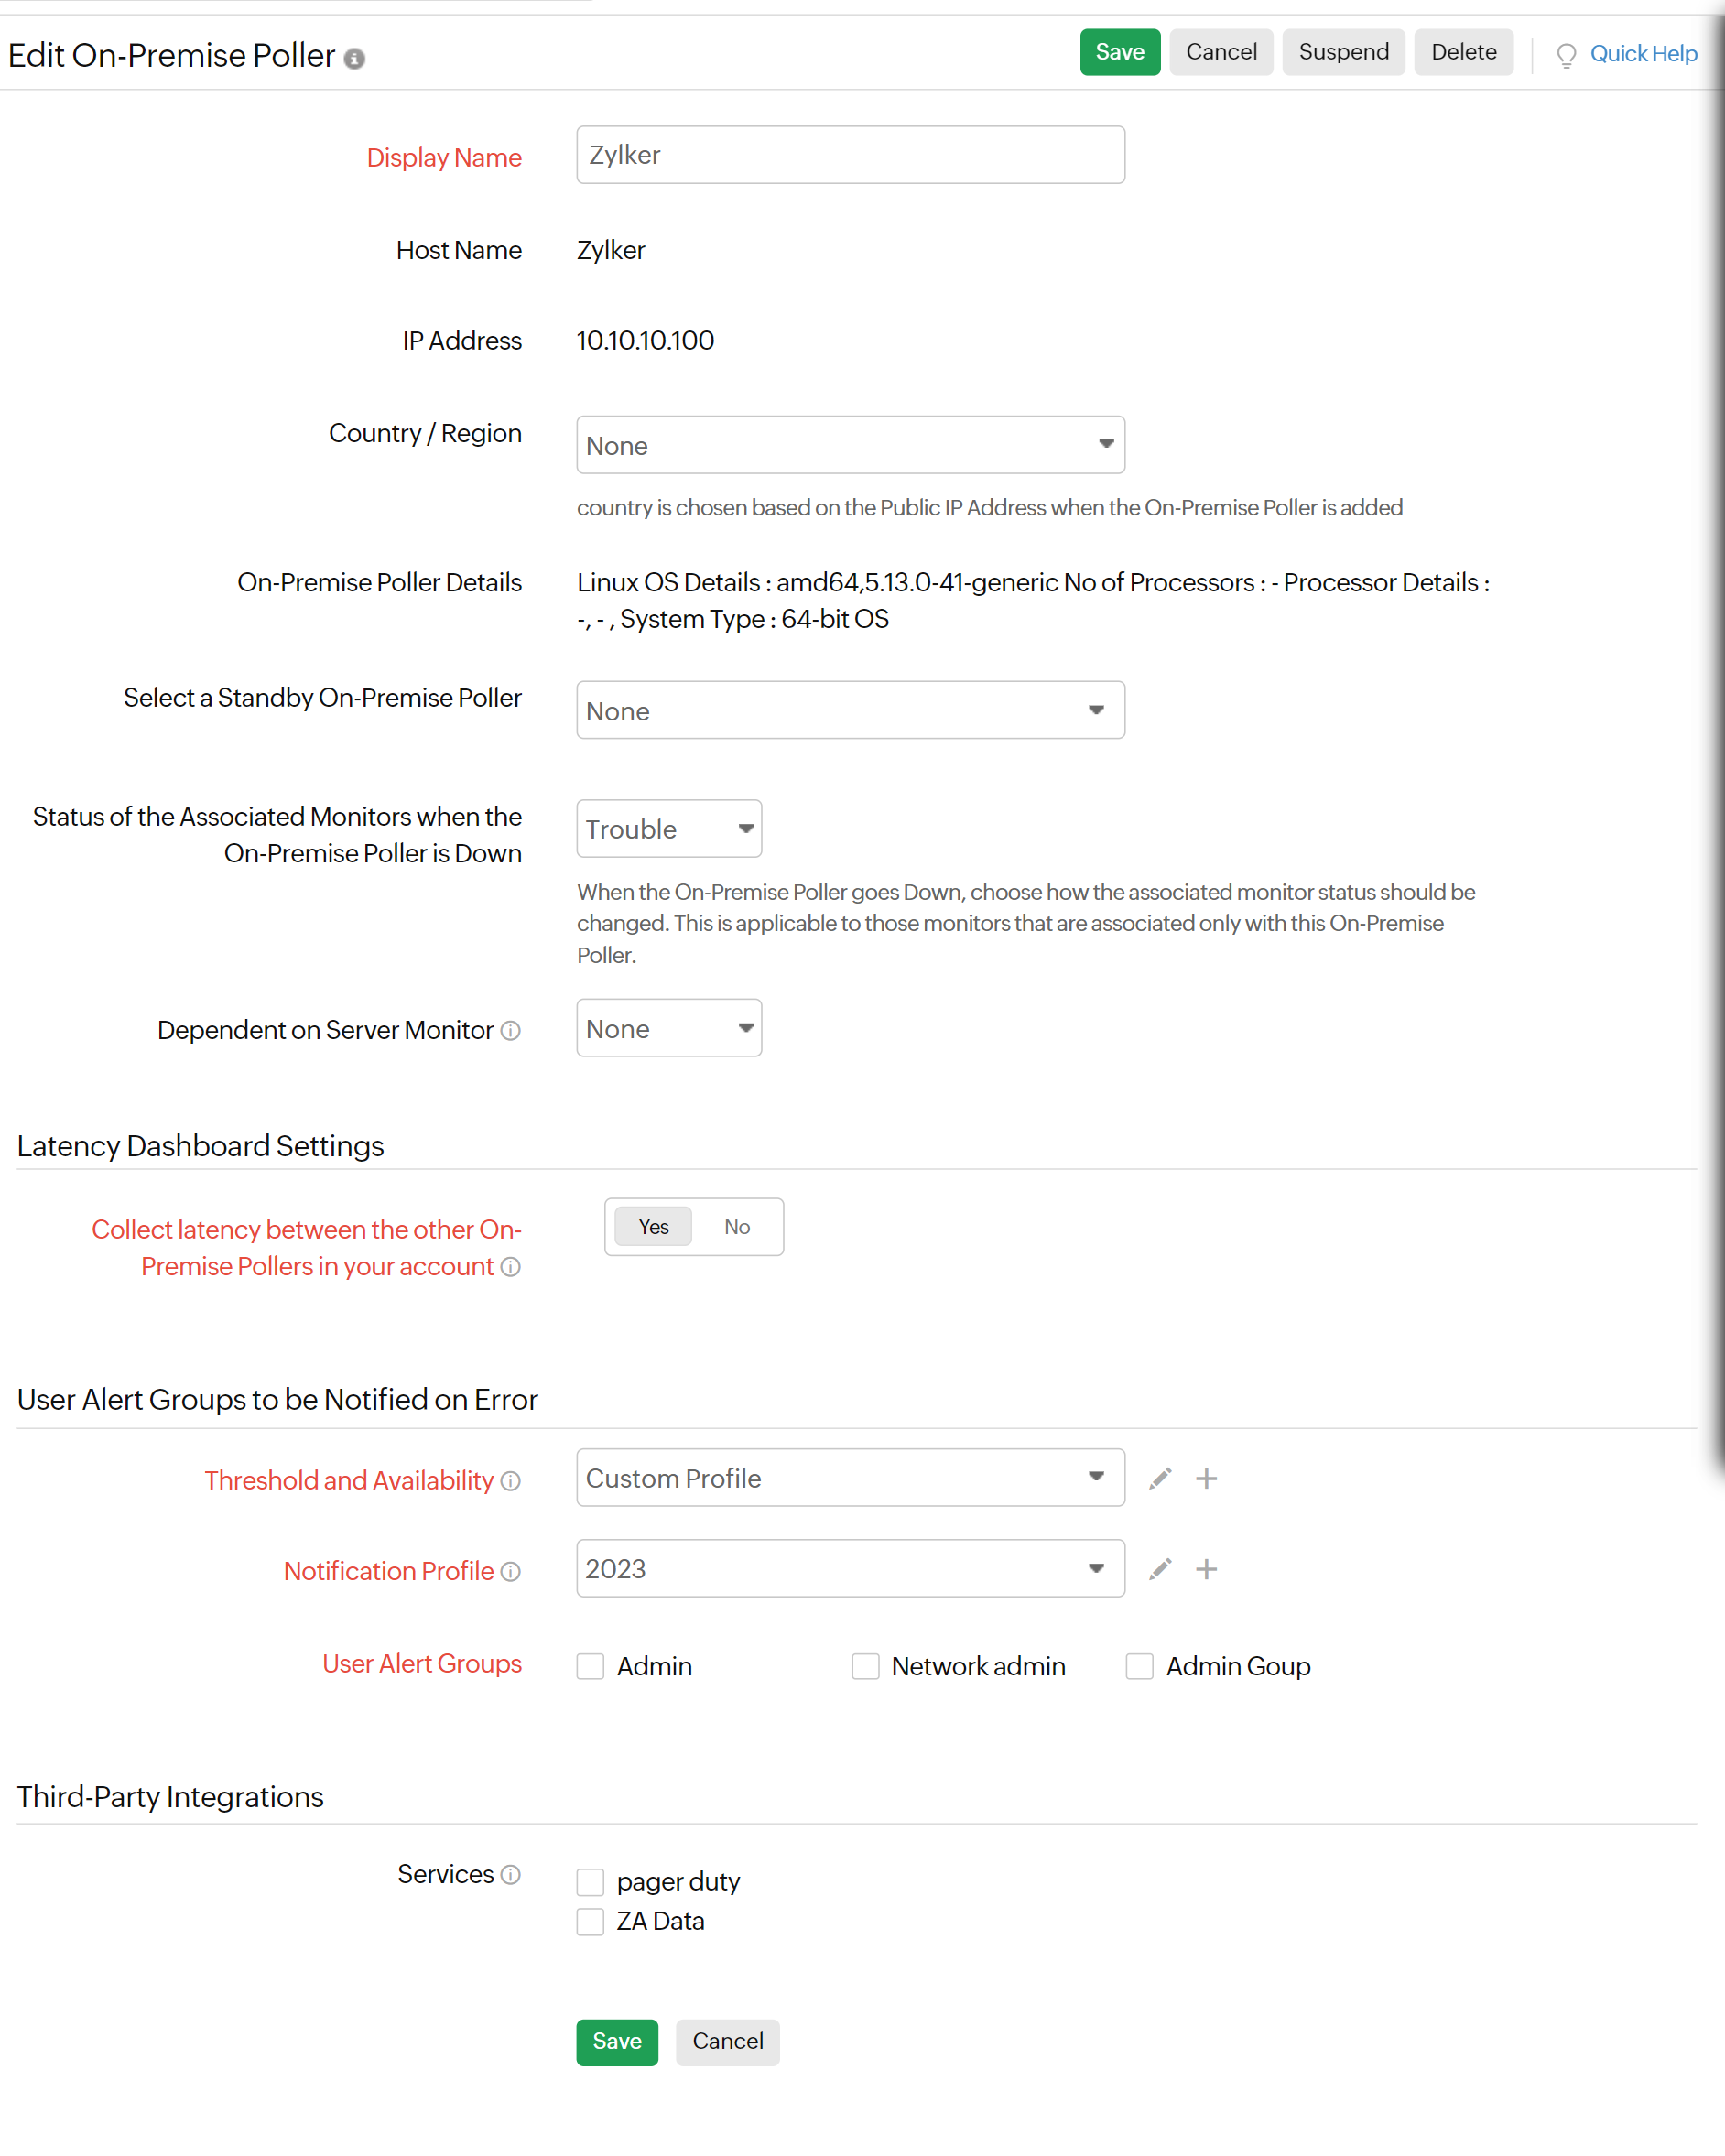
- In the Edit On-Premise Poller page, you can edit the Display Name and view the basic details like Host Name, IP Address, and other On-Premise Poller Details.
- You can also update the following settings:
- Select a Standby On-Premise Poller: Choose an On-Premise Poller from the drop-down menu that you want to act as standby when this On-Premise Poller goes down. This will ensure your On-Premise Poller's High Availability which means that your resources will be continuously monitored even when this On-Premise Poller goes down. Make sure that the On-Premise Poller that you choose follows certain prerequisites.
- Status of the Associated Monitors when the On-Premise Poller is Down: When the On-Premise Poller goes Down, choose how the associated monitors' status should be changed. This applies to those monitors that are associated only with this On-Premise Poller. Here you can choose:
- None: If you don't want the status of the monitors to be changed.
- Trouble: This is the default option where all the monitors associated with the particular On-Premise Poller will go to the Trouble state.
- Critical: If you want all the monitors associated with the particular On-Premise Poller to go to the Critical state.
NoteMonitors that have multiple On-Premise Pollers associated with them or a Location Profile which includes this On-Premise Poller along with other locations will not be affected by this setting. If your On-Premise Poller is configured with High Availability, then its associated monitors will not be affected by this change.
- Dependent on Server Monitor: Set up a dependent monitor, which would then suppress alerts sent to monitors based on the down status of that selected monitor. Configuring a dependent monitor can help limit the number of alert notifications. To put it simply, if an On-Premise Poller is installed on a server and that server monitor goes down, selecting the server monitor (i.e., configuring a dependent monitor) from this drop-down will suppress the alerts, thereby reducing the number of alert notifications.
- User Alert Groups to be Notified on Error
- Threshold and Availability: Select a threshold profile from the drop-down list, use the default threshold profile available, or create a new one, and get notified when the resources cross the configured threshold and availability.
- Notification Profile: The Notification Profile helps to configure when and who gets notified in case of downtime. Choose a notification profile from the drop-down list, use the default profile available, or create a custom notification profile.
- User Alert Group: Select the user group that needs to be alerted during an outage, or add multiple users to a group.
- Third Party Integrations
Services: Associate your monitor with a pre-configured third-party service. It lets you push your monitor alarms to selected services and facilitate improved incident management.NoteIf you haven't setup any integrations yet, navigate across to ”Admin > Third Party Integration” to create one. Tell me more.
- Click Save.

Related articles
-
On this page
- Editing an On-Premise Poller
