APM Insight .NET agent bulk installation using ManageEngine Endpoint Central
You can install the APM Insight .NET agent on multiple machines at once by following the steps given below:
- Download the APM Insight .NET agent from the Site24x7 account.
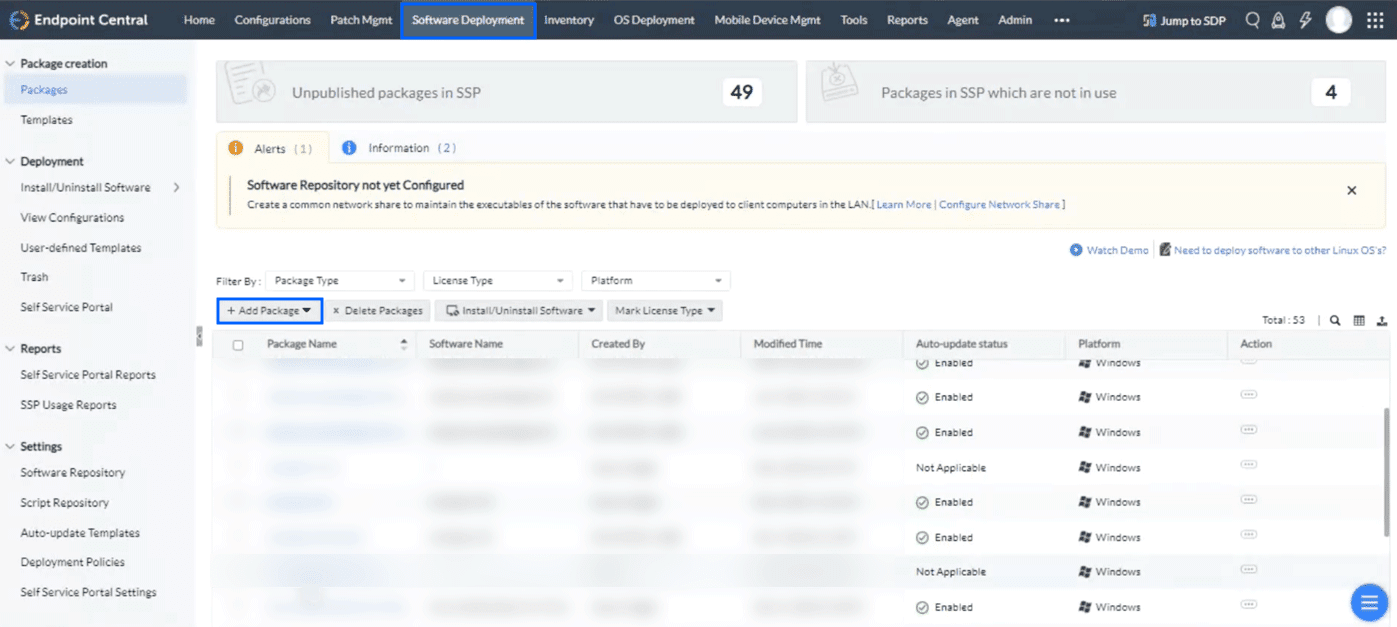
- Log in to the ManageEngine Endpoint Central portal and click the Software Deployment tab.
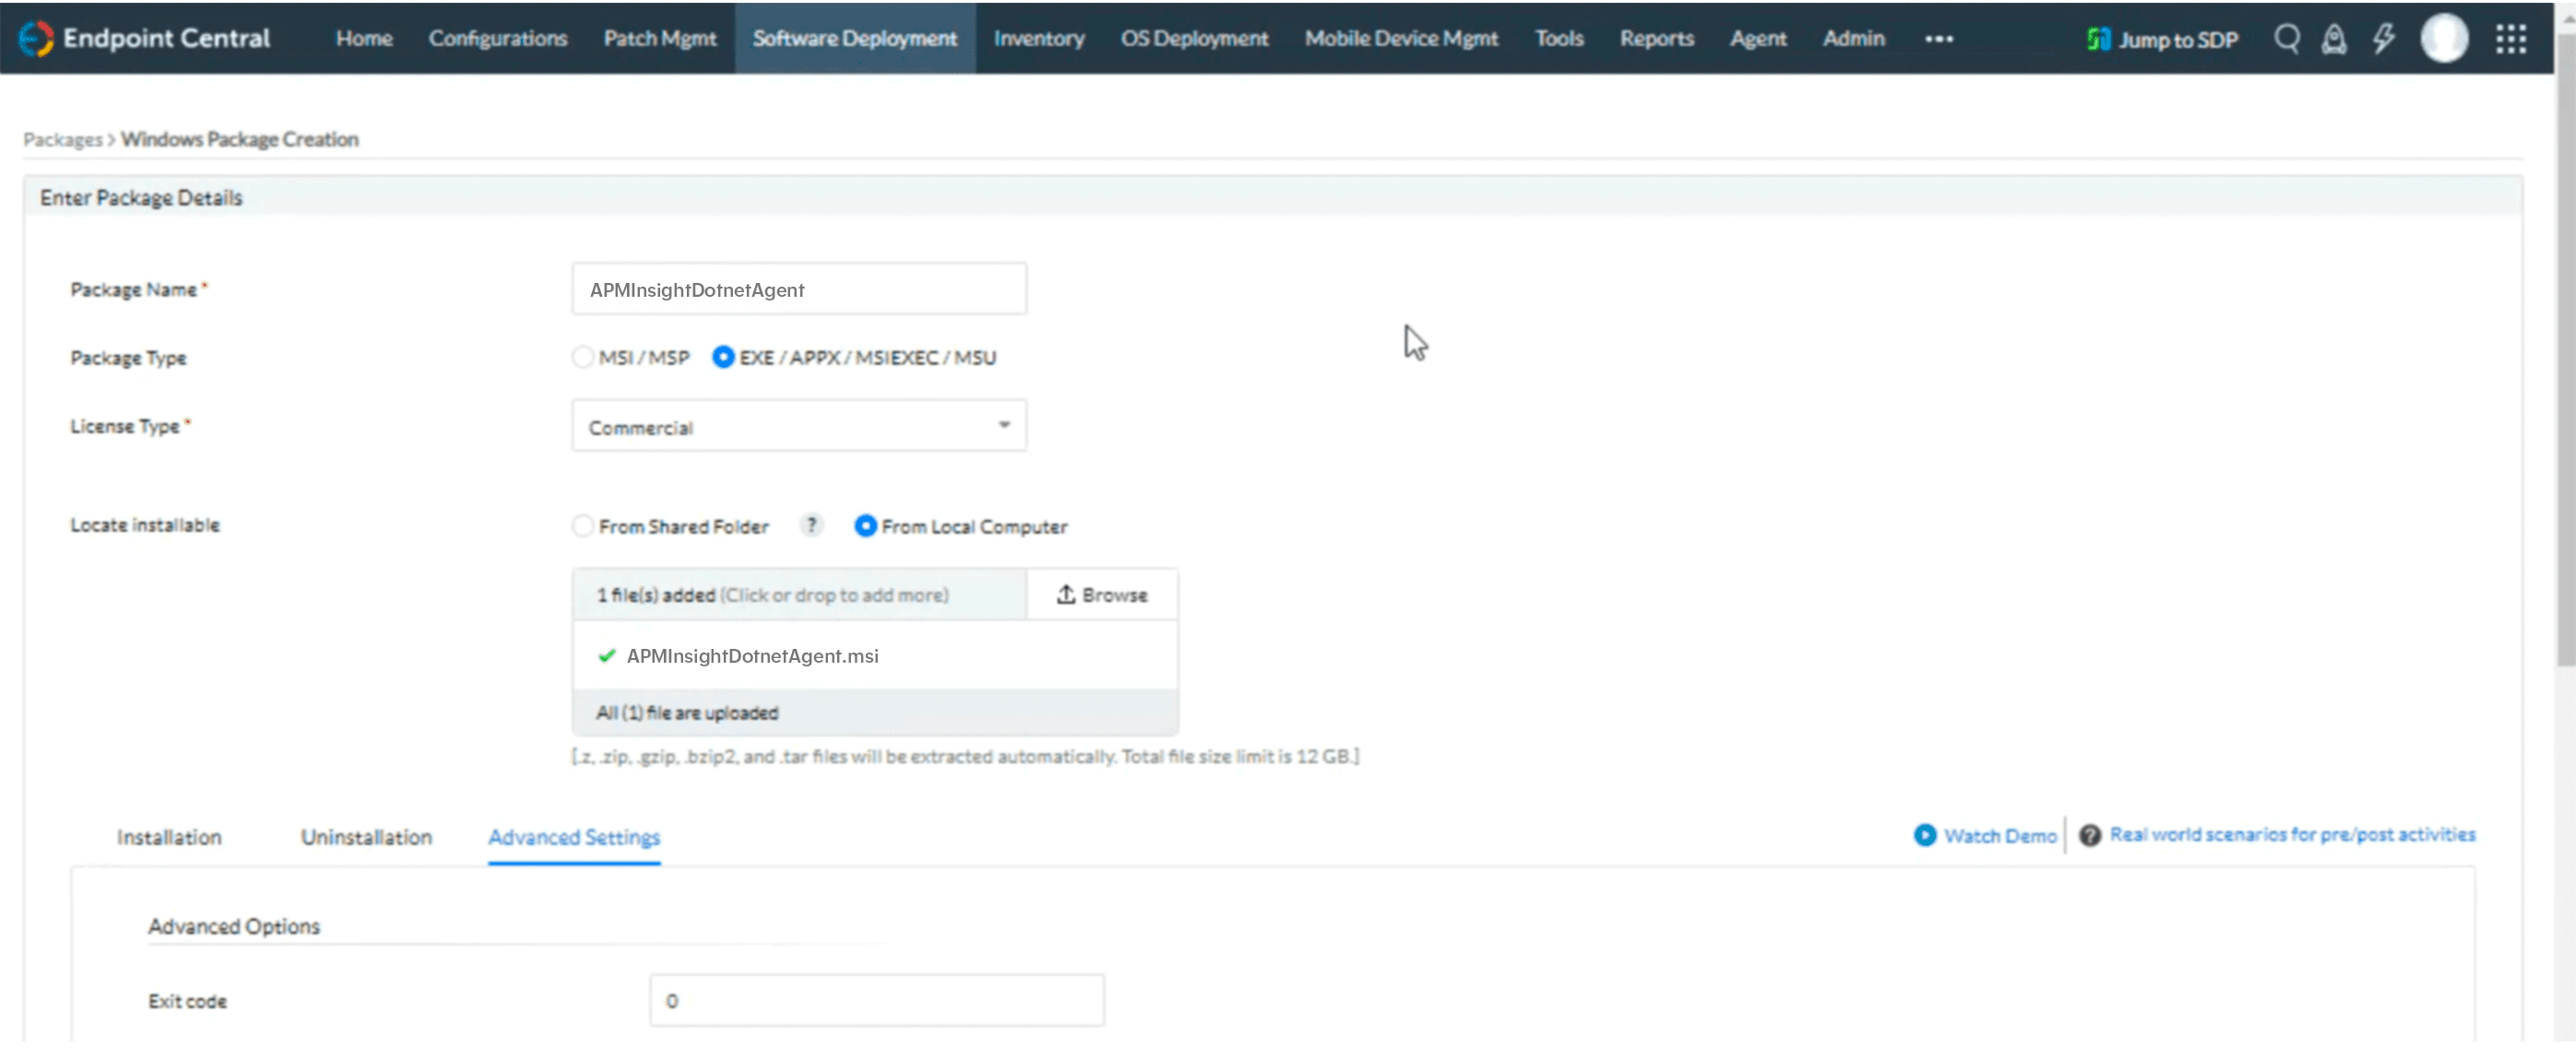
- Click Add Packages (Windows).
- Provide the package details as given below.
- Package Name: APMInsightDotnetAgent
- Package Type: EXE/APPX/MSIEXEC/MSU
- License Type: Commercial
- Locate installable: Select Local Computer and upload the downloaded MSI file.
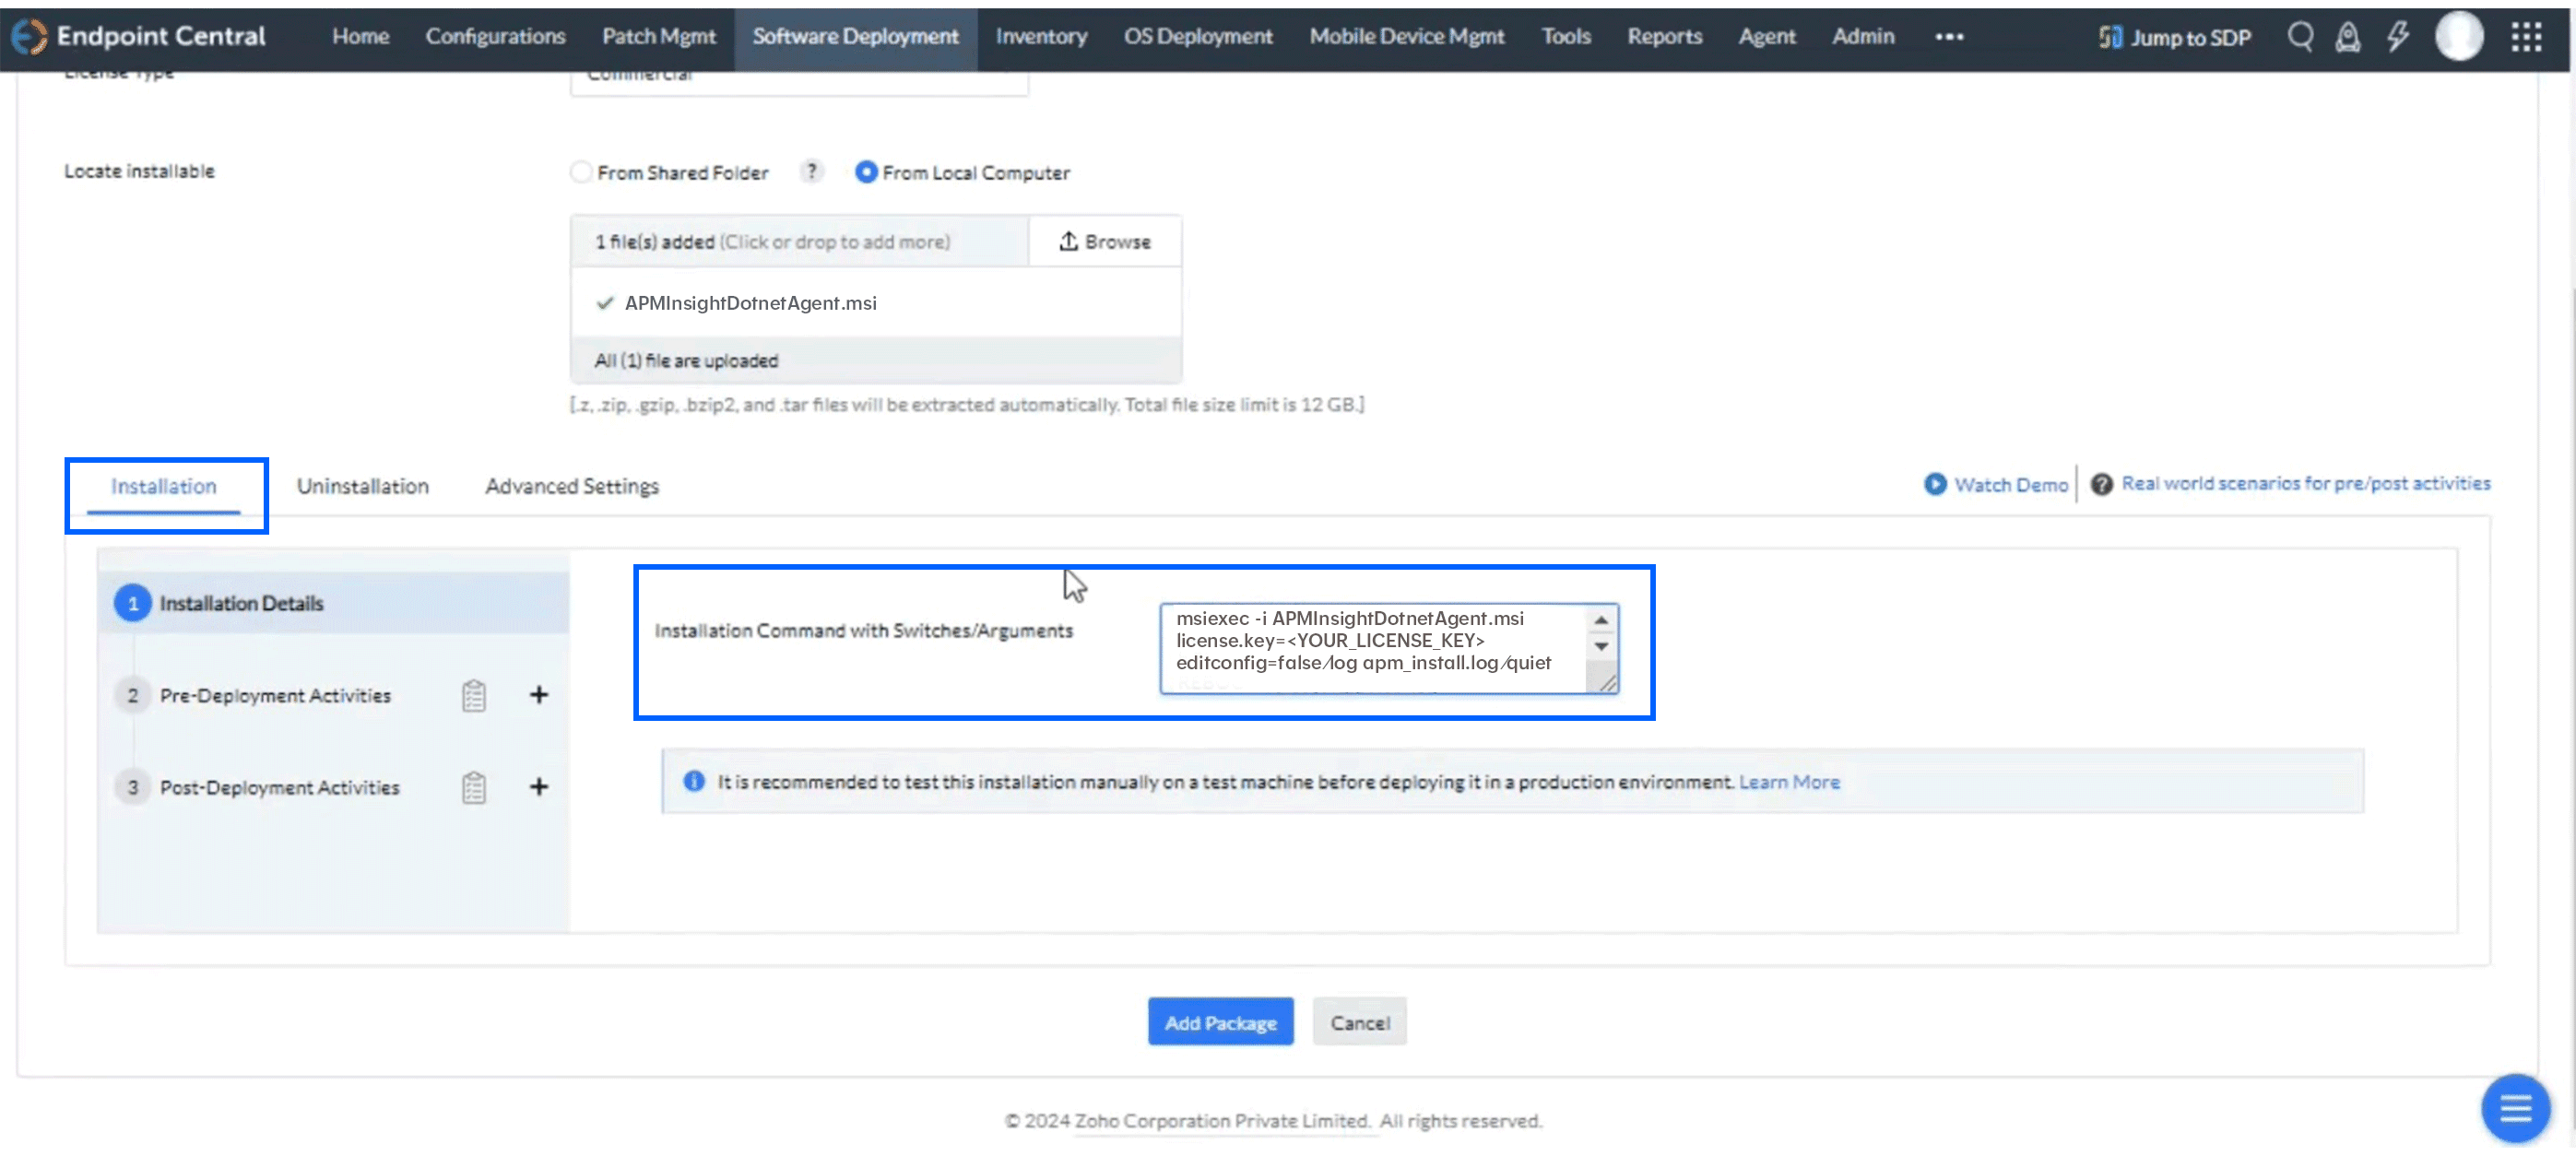
- Navigate to the Installation tab and enter the following command in the Installation Command with Switches/Arguments box.
NoteThe command can be customized as per your requirement by modifying the parameters.
msiexec -i apminsight-dotnetagent.msi license.key=<YOUR_LICENSE_KEY> editconfig=false /log apm_install.log /quiet
- Click Add Packages.
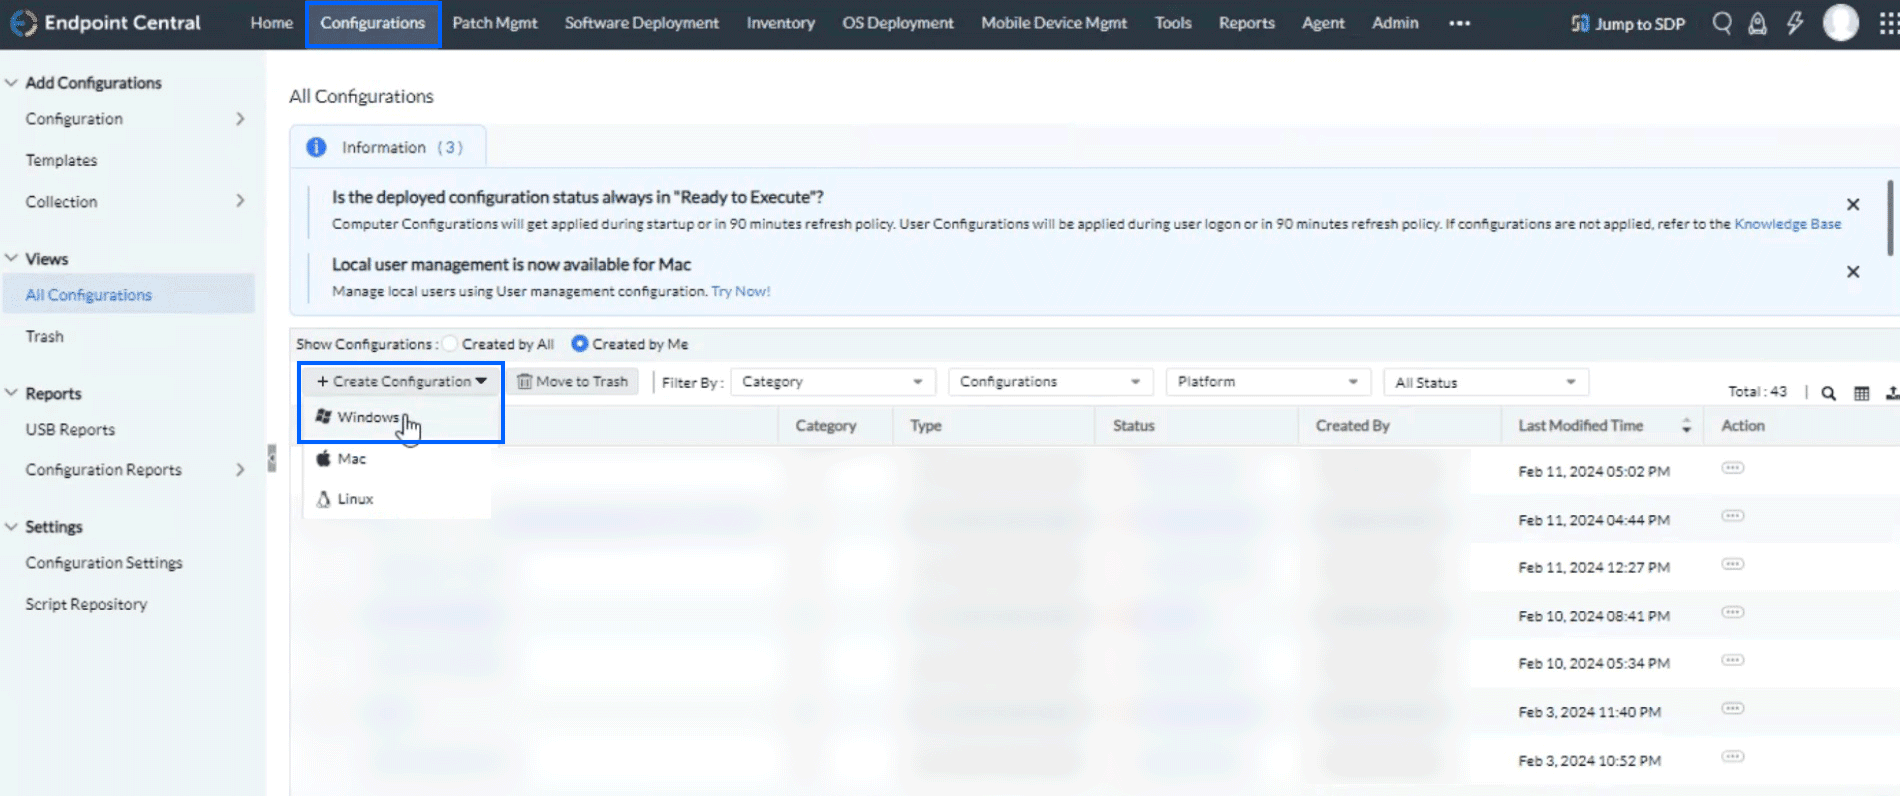
- Now, navigate to the Configurations tab and click +Create Configuration (Windows).
- Provide the necessary information as given below.
- Name: Provide the configuration name as per your convenience.
- Operation Type: Install
- Package Name: Select the created package from the drop-down menu.

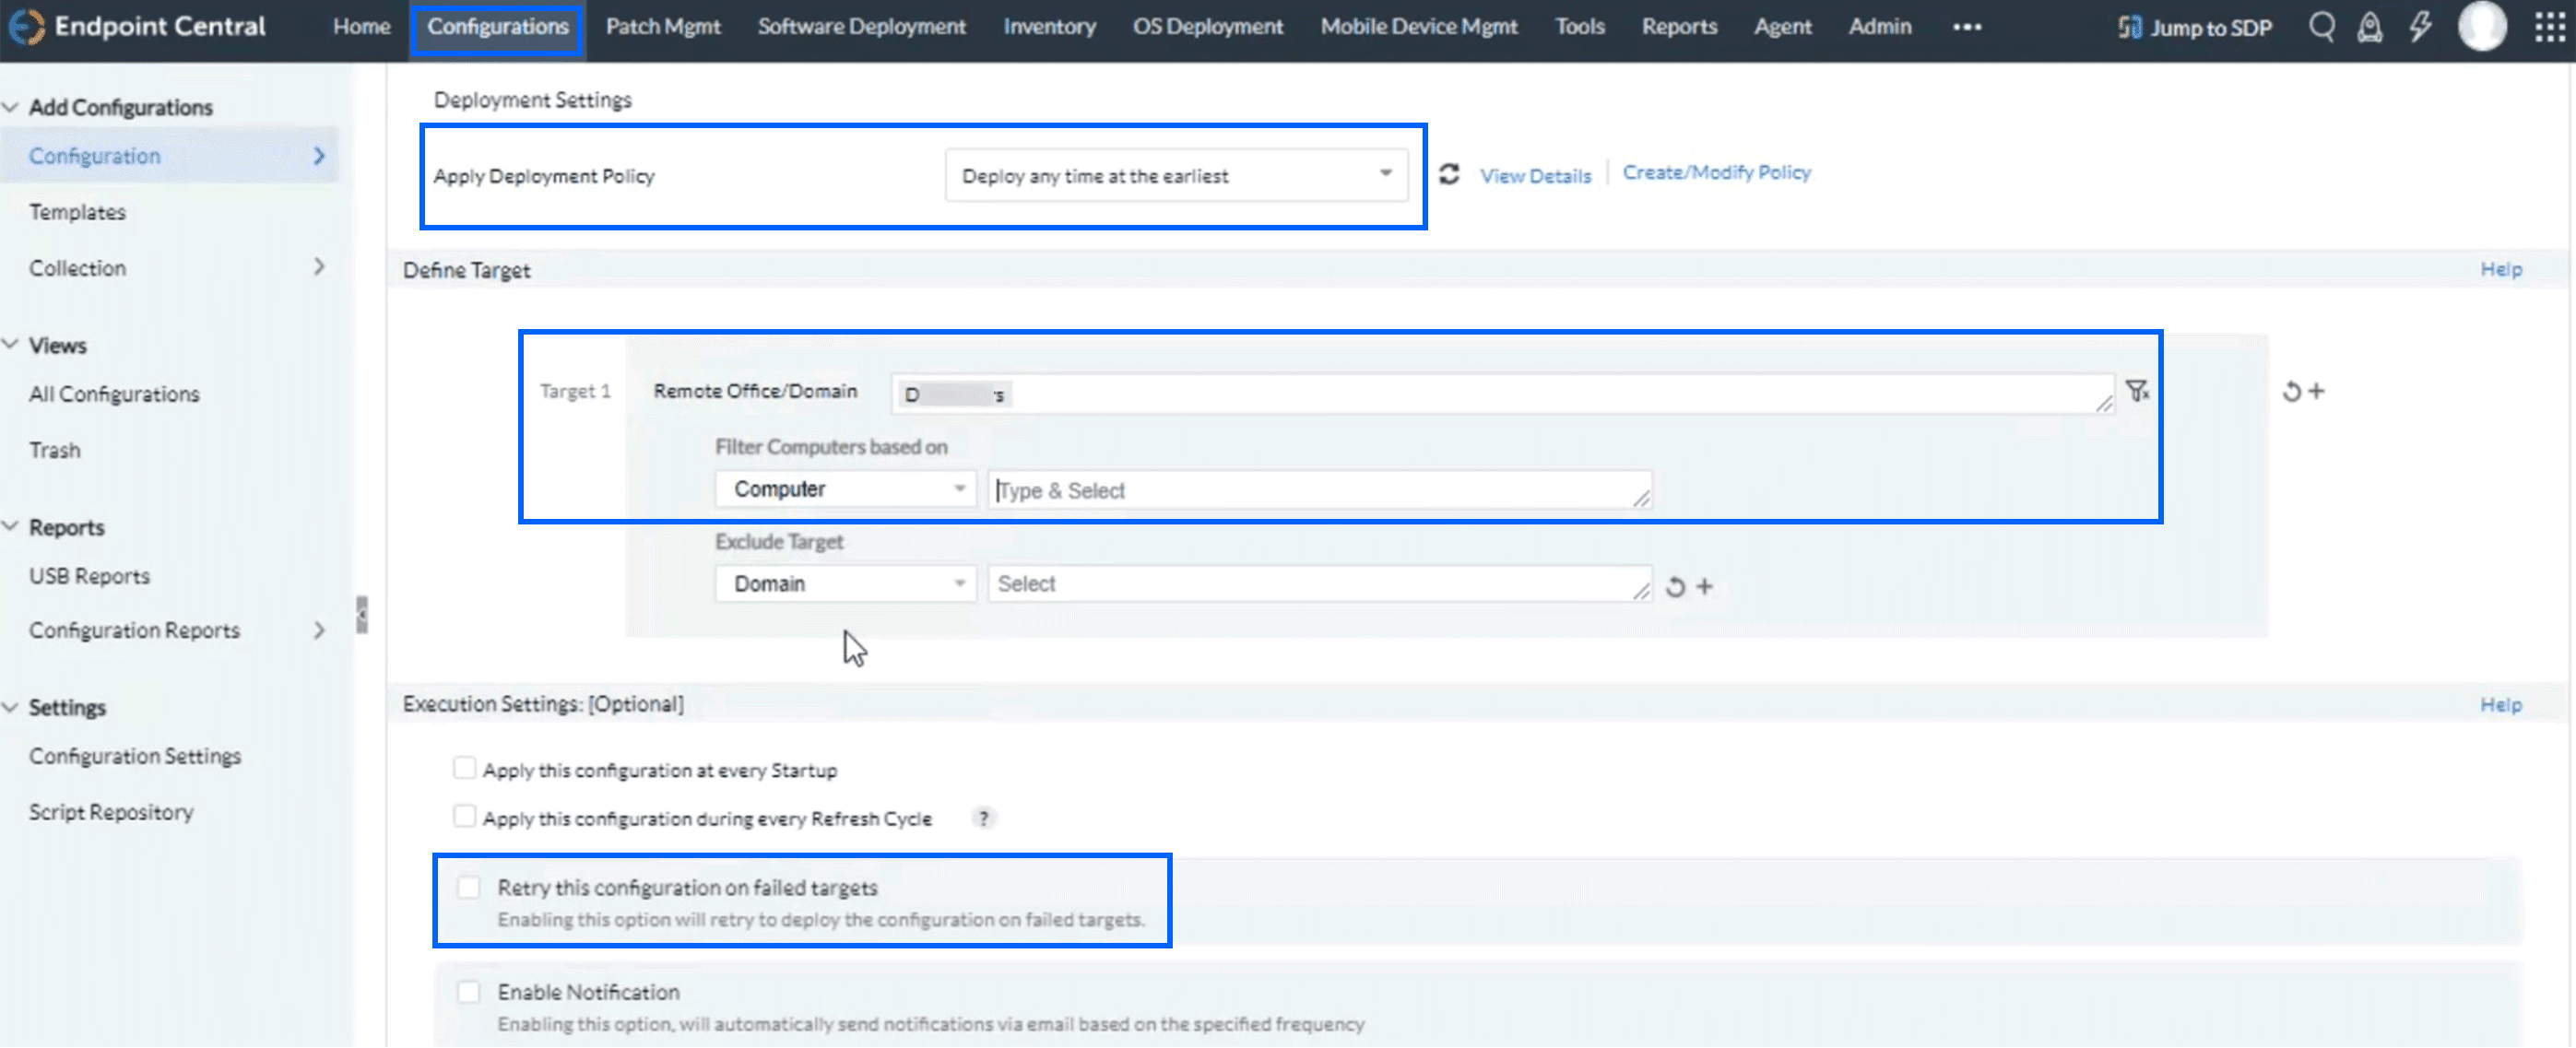
- In the Deployment Settings, enter the following details as given below.
- Apply Deployment Policy: Deploy any time at the earliest.
- Remote Office/Domain: As per your configuration in the infrastructure
- Filter Computers based on: Computer as <hostname>.
NotePlease remember to uncheck the Retry this configuration on failed targets box.
- Click Deploy Immediately.